Guide: your first flue gas measurement with Kehrwerk, from install to PDF
Seven steps, about ten minutes the first time and two minutes per appliance after that. How to get from a freshly installed app to a finished measurement protocol as a PDF.
This guide is for chimney sweeps who have just installed Kehrwerk and want to get the first measurement right. The app is free for one person for good, needs no account and works in a cellar with no signal. All you need is your phone and an appliance to measure. Every step below names the buttons as they appear in the app, on iPhone and on Android.
Step 1: install and open the app
Get Kehrwerk from the App Store or Google Play. On first launch you see "Welcome to Kehrwerk" with three points: Measure with no signal, See the limit immediately, and One export at the end of the day. Below that is the line that makes the difference: no account, no sign in. Tap "Continue" and you are on "Today".
At the bottom there are five sections: Today, Calendar, History, Business and Settings. For the first measurement you only need Business and Today.
Get Kehrwerk now
Free for one person for good, no account and no sign in. The first measurement works in a cellar with no signal.


Step 2: set up your business once
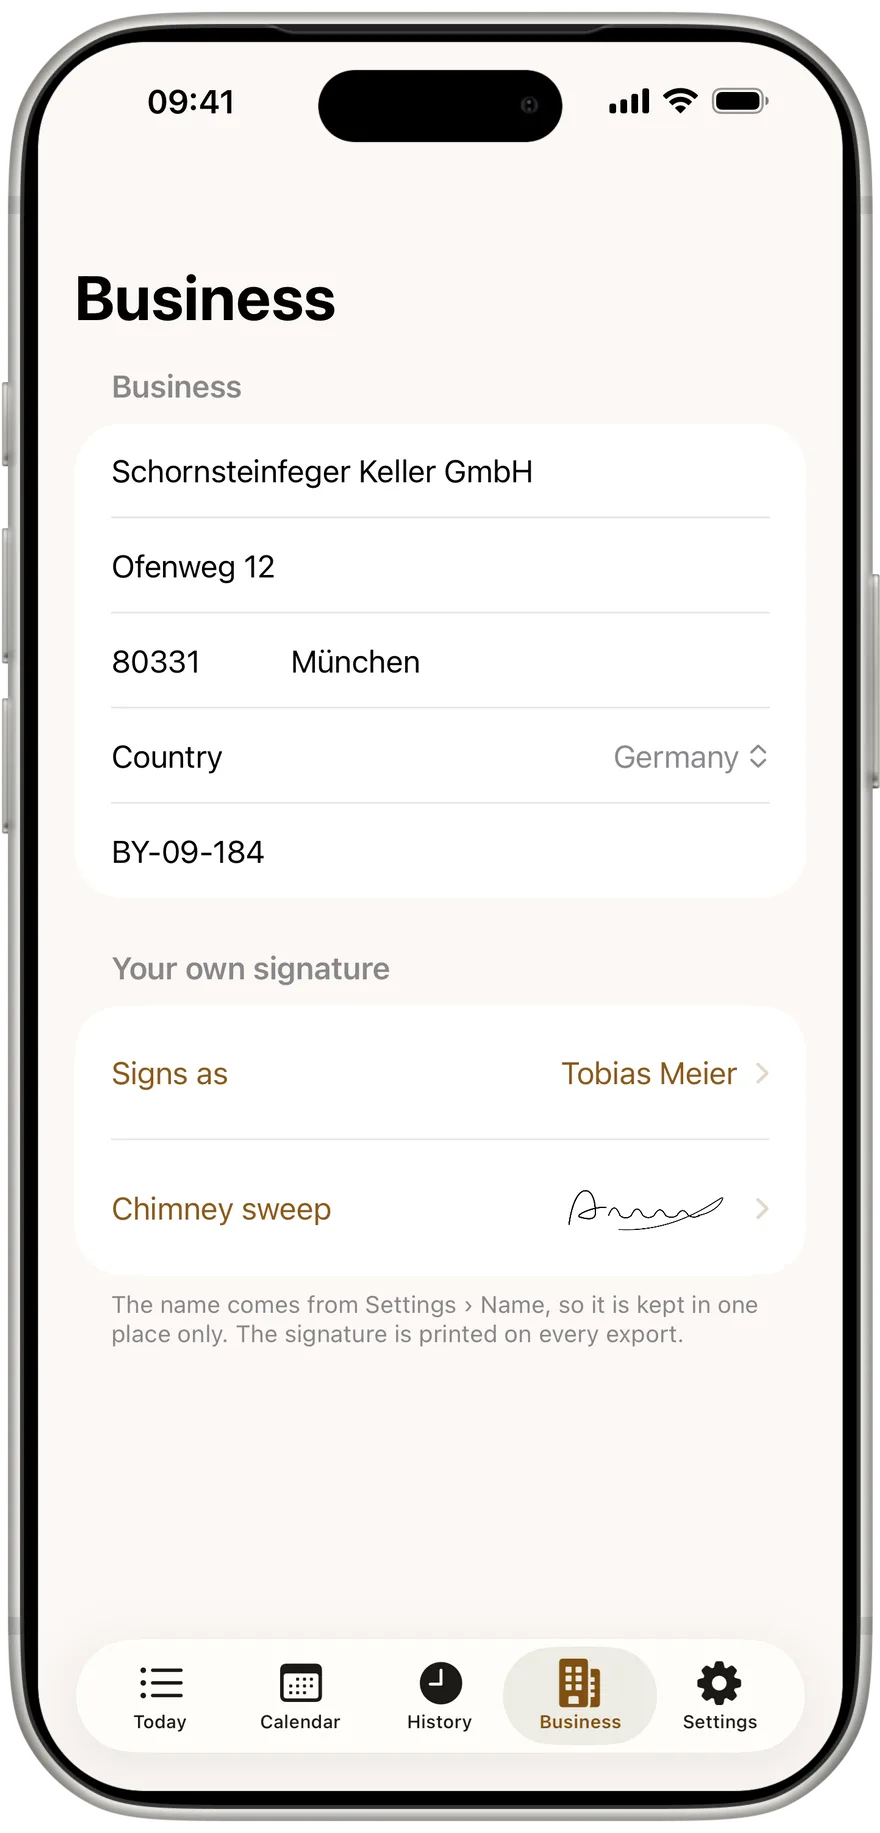
Open "Business". Everything here goes into the letterhead of every protocol, so you do it exactly once:
- Company name, street, postcode and town.
- Country: Germany, Austria or Switzerland. The country decides which values are asked for and which limits are checked.
- Business / district number.
- Your own signature: tap "Chimney sweep" and sign once with your finger. It is printed on every export, so you never sign each measurement separately.
The "Signs as" row shows your name. If it says "No name set", tap it and enter your name. It is kept in this one place and appears on every measurement you take with this phone.
Step 3: add an appointment
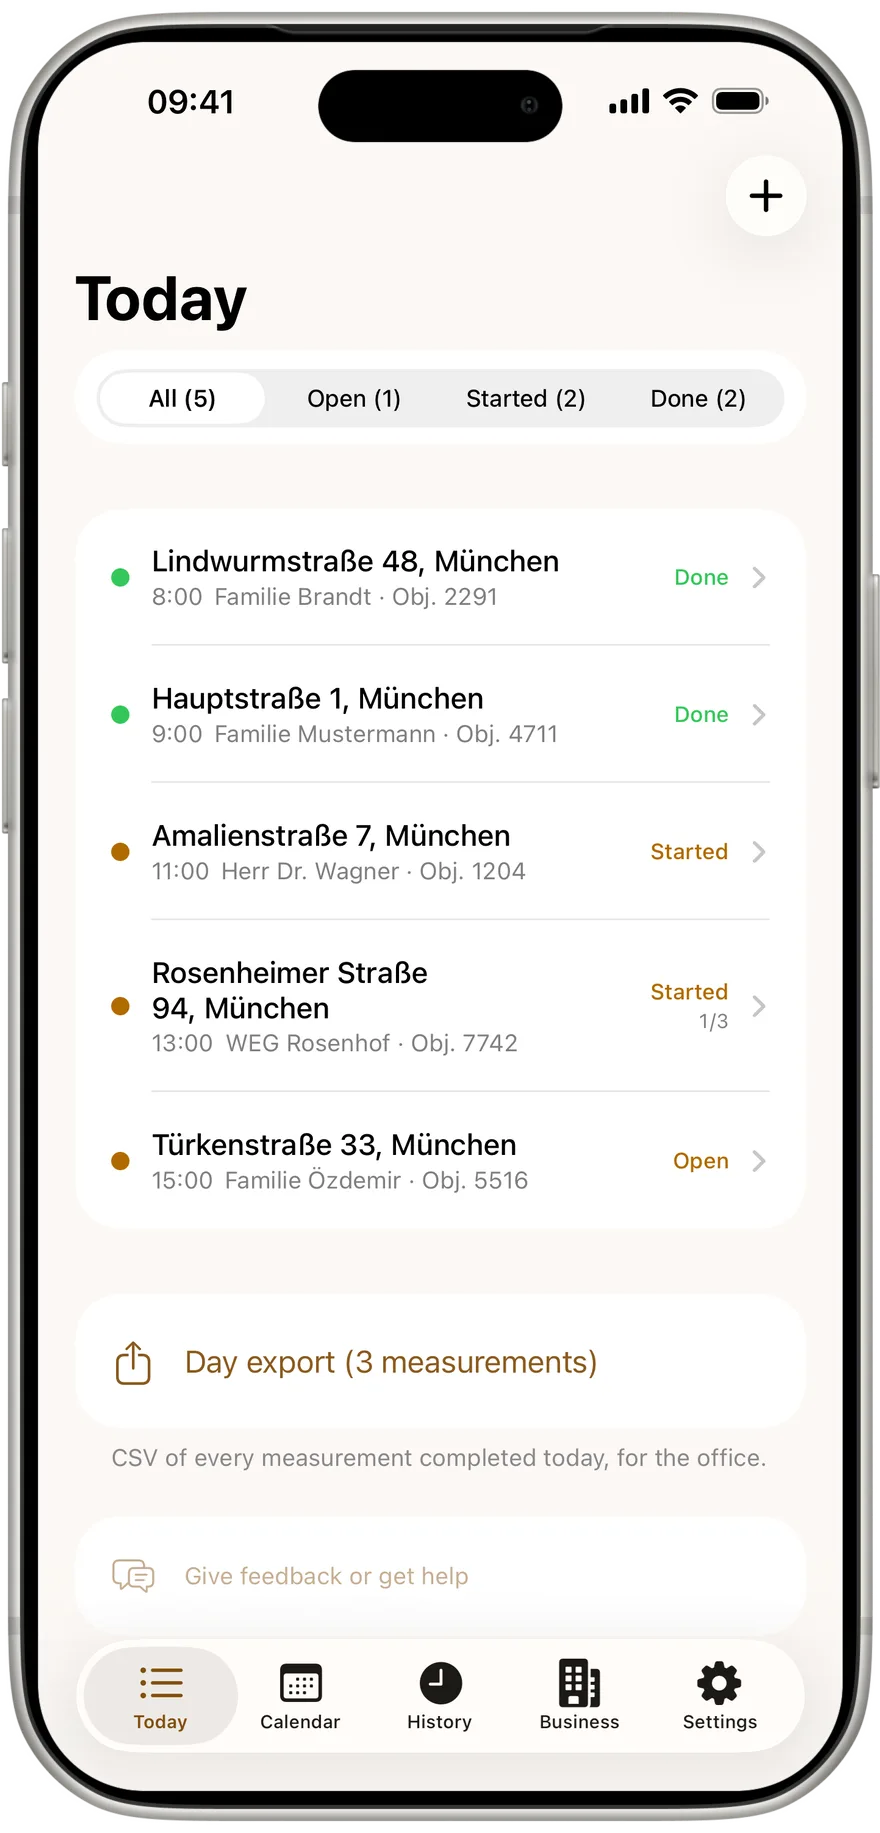
Back on "Today". With nothing planned you see "Nothing planned today" and two buttons: "Import addresses" and "Add appointment". For the first measurement one appointment is enough. Tap "Add appointment".
- iPhone: once the list has appointments, "Add appointment" sits behind the plus at the top right.
- Android: "Add appointment" is the large button at the bottom right, import sits in the top bar.
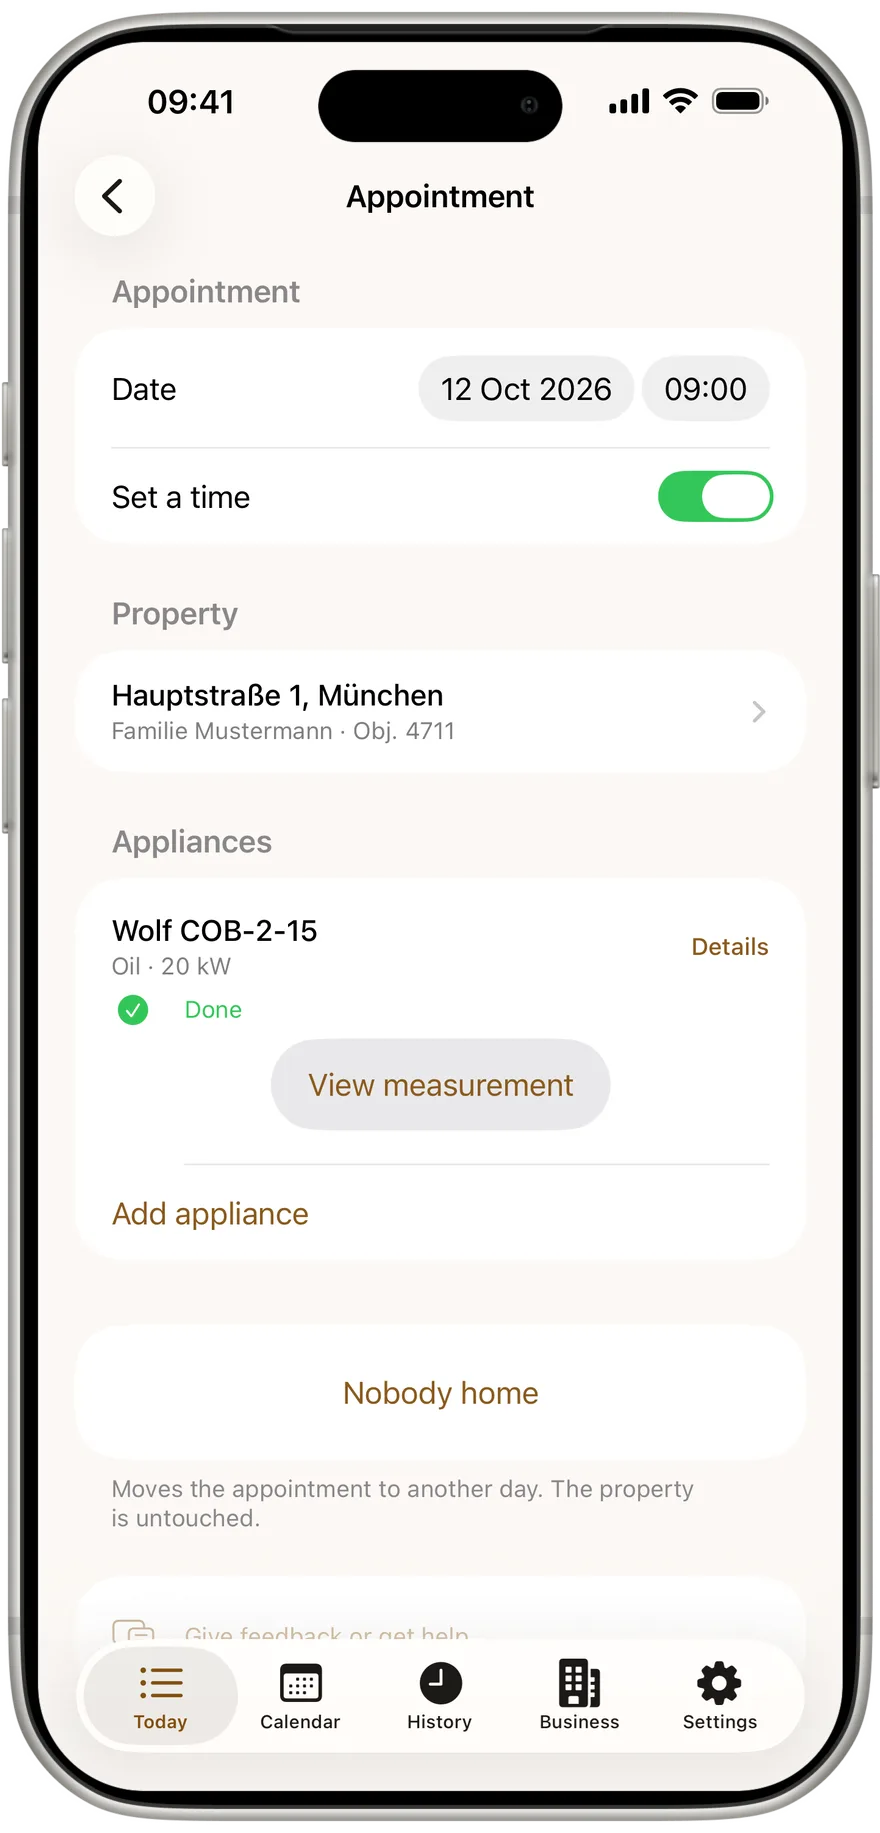
The new appointment is set for today. Under "Appointment" you can change the date and use "Set a time" for a fixed time.
Step 4: enter the property
In the appointment, tap "Add property details". Enter where you are: the owner's name, street and number, postcode and town. The country is taken from your business automatically. Under the heating installation notice you have district number, object number and the notice date if there is one. Location in building and a note are optional.
If your addresses are already in your district software, the CSV import saves you this step from then on. See the guide on appointments and address import.
Step 5: add the appliance
Under "Appliances" tap "Add appliance". First pick the type from five rows: gaseous fuels, liquid fuels, solid fuel boiler, room heater, or CHP / heat pump / fuel cell. The type decides which fields the measurement will show.
Then manufacturer, model and serial number. Most important is the rated heat output in kW: in Germany the flue gas loss limit depends on it, over 4 to 25 kW 11 percent, over 25 to 50 kW 10 percent, over 50 kW 9 percent. Without it, the appliance row says "kW missing".
Step 6: start the measurement and type the values
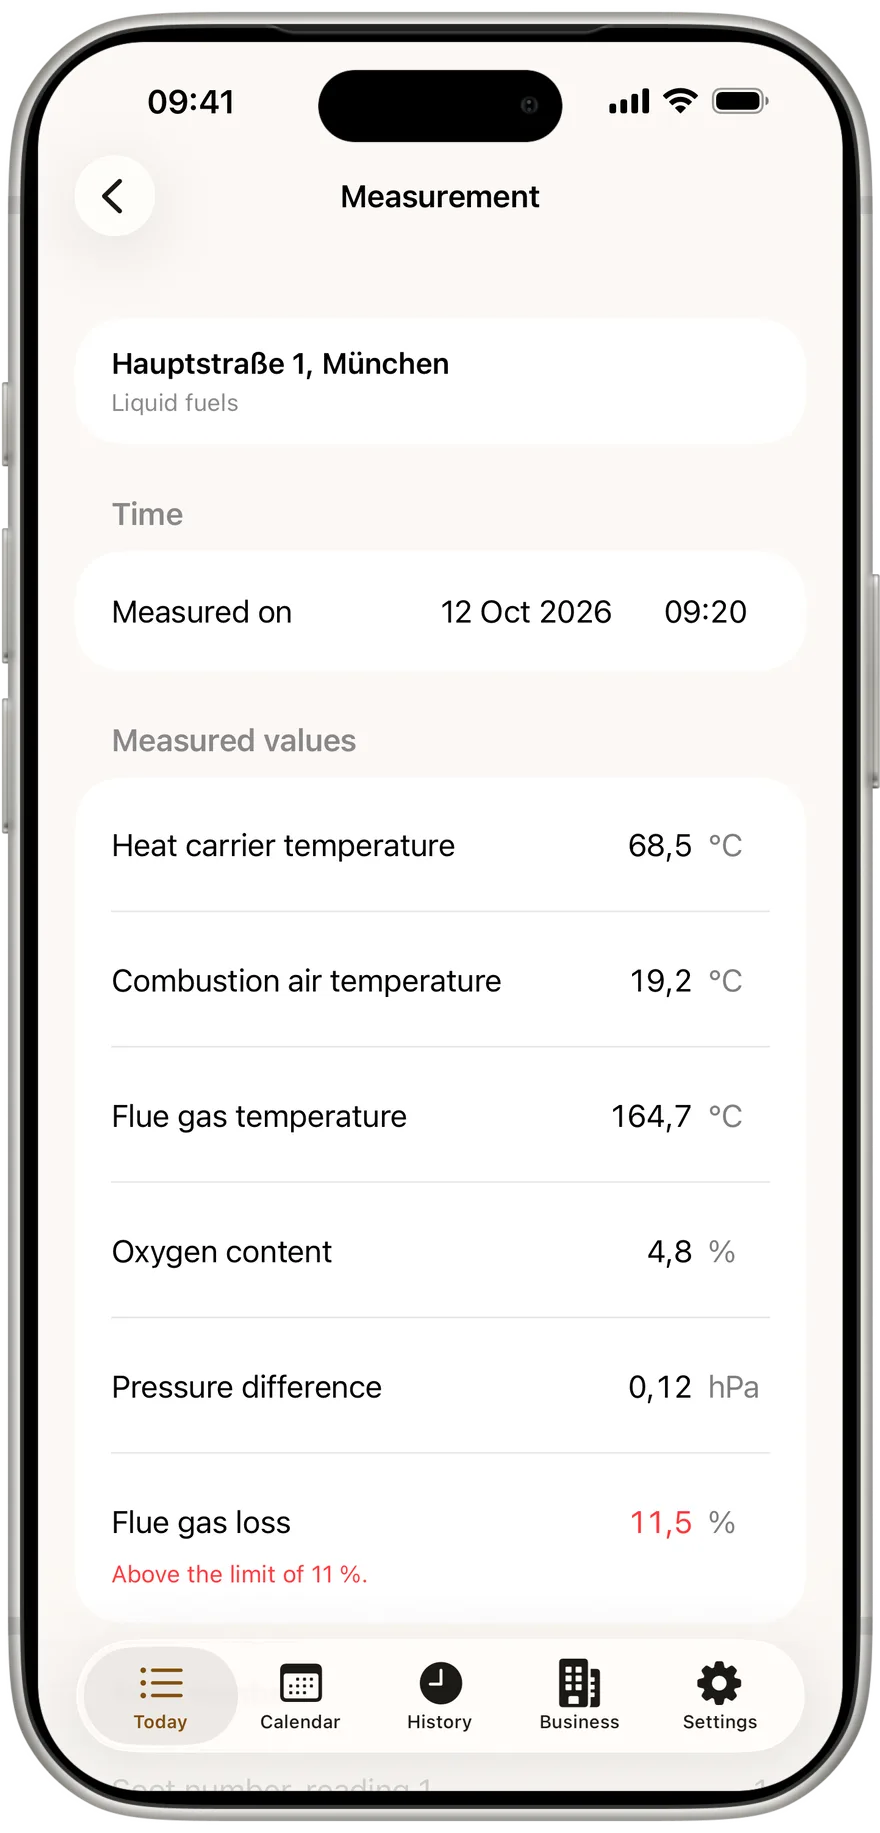
Below the appliance you now see "Start measurement". One tap and the measurement is open. At the top are property and appliance type, then "Measured on" and the measured values. For a gas boiler in Germany that is six fields: heat carrier temperature, combustion air temperature, flue gas temperature, oxygen content, pressure difference and flue gas loss.
Type the values as you read them off the analyser, with a comma. Every keystroke is saved at once. There is no save button, and a half filled measurement is still a saved measurement. If the phone rings, just answer it.
As soon as the flue gas loss is in, the app checks it against the limit. Under the field you see, for example, that the 11 % limit is met, or in red, "Above the limit of 11 %." An oil boiler adds three soot numbers with an automatic average and the oil derivative check.
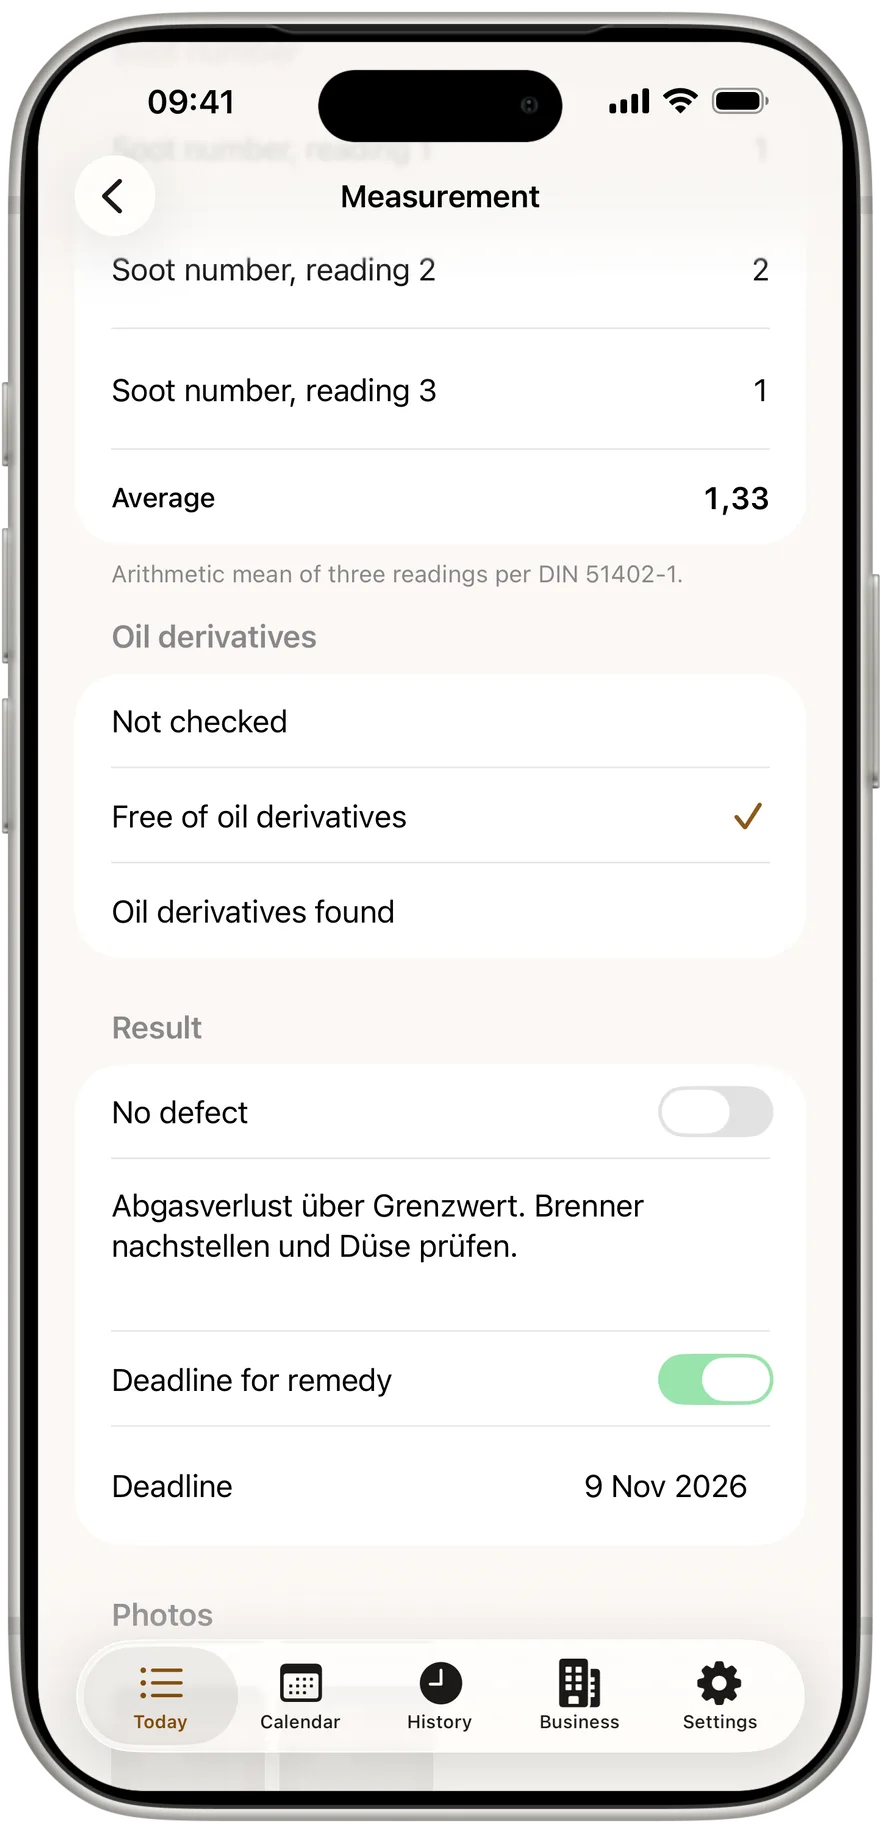
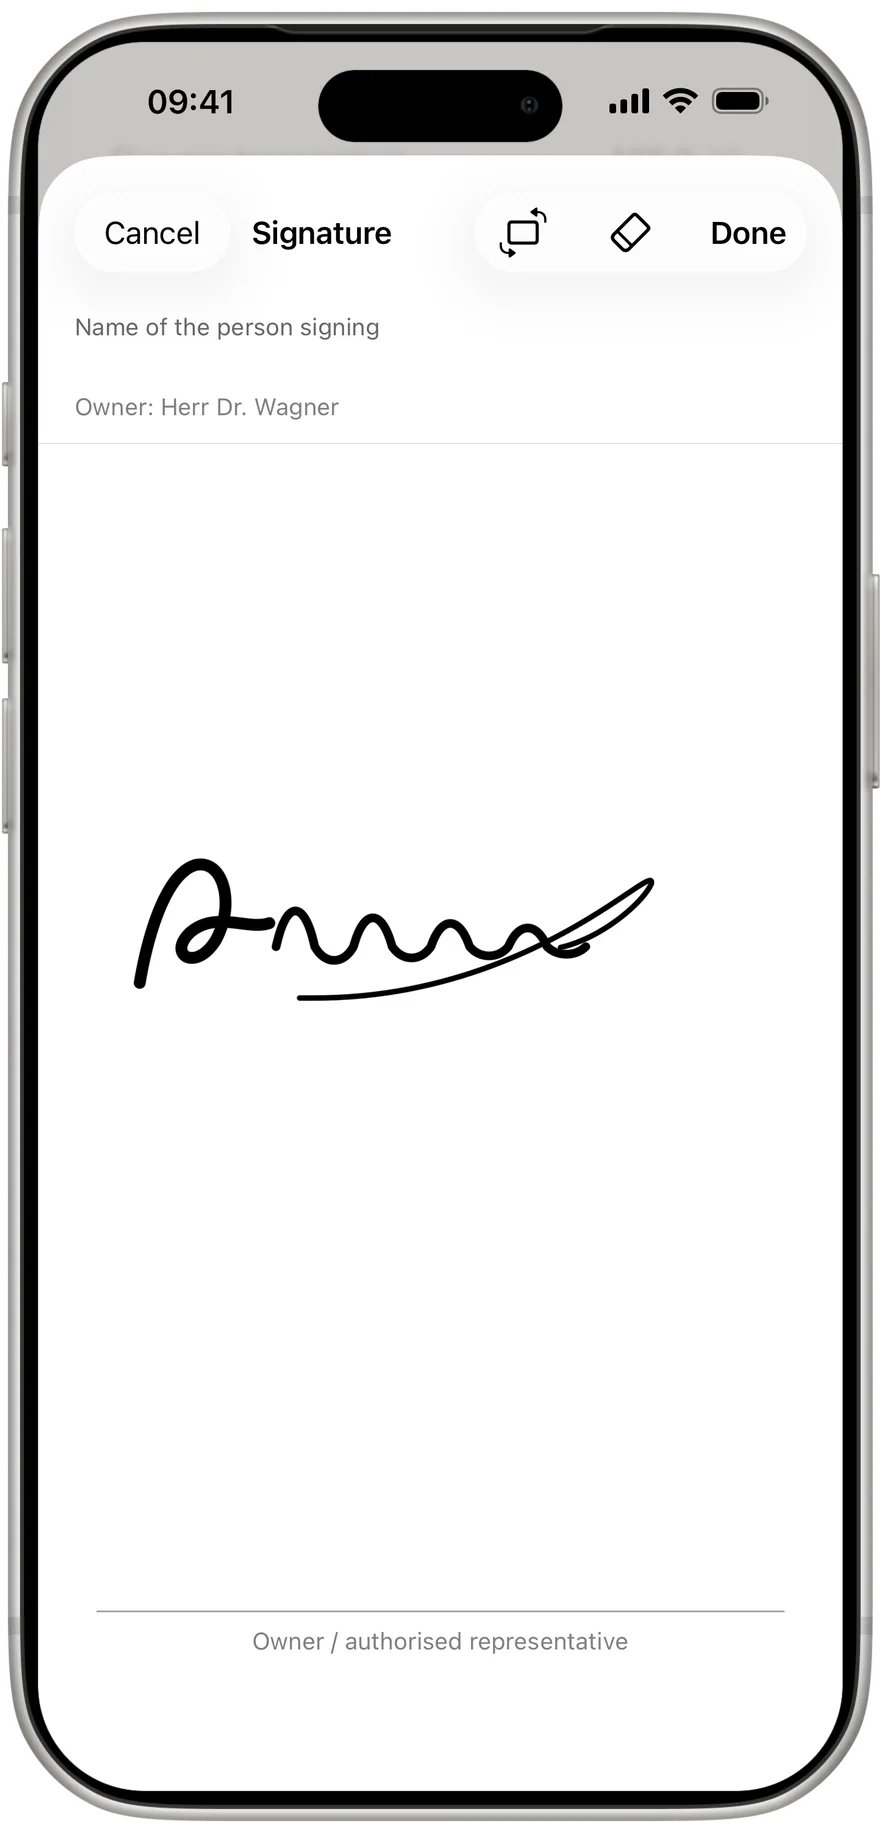
Below come result, photos and signature. Leave "No defect" on if everything is fine. "Take photo" captures the rating plate or the analyser, and under Signature the owner signs with a finger.
Try it on the next appliance
No account, no trial clock, free for one person for good. Values are saved as you type, with or without signal.
Step 7: complete and share the PDF
At the bottom is "Complete measurement". If a value is missing, the footer says "Still outstanding:" and names the fields. You can still complete, because missing values never block. With everything filled in it reads: Everything is saved continuously, with or without signal. Completing only sets the timestamp.
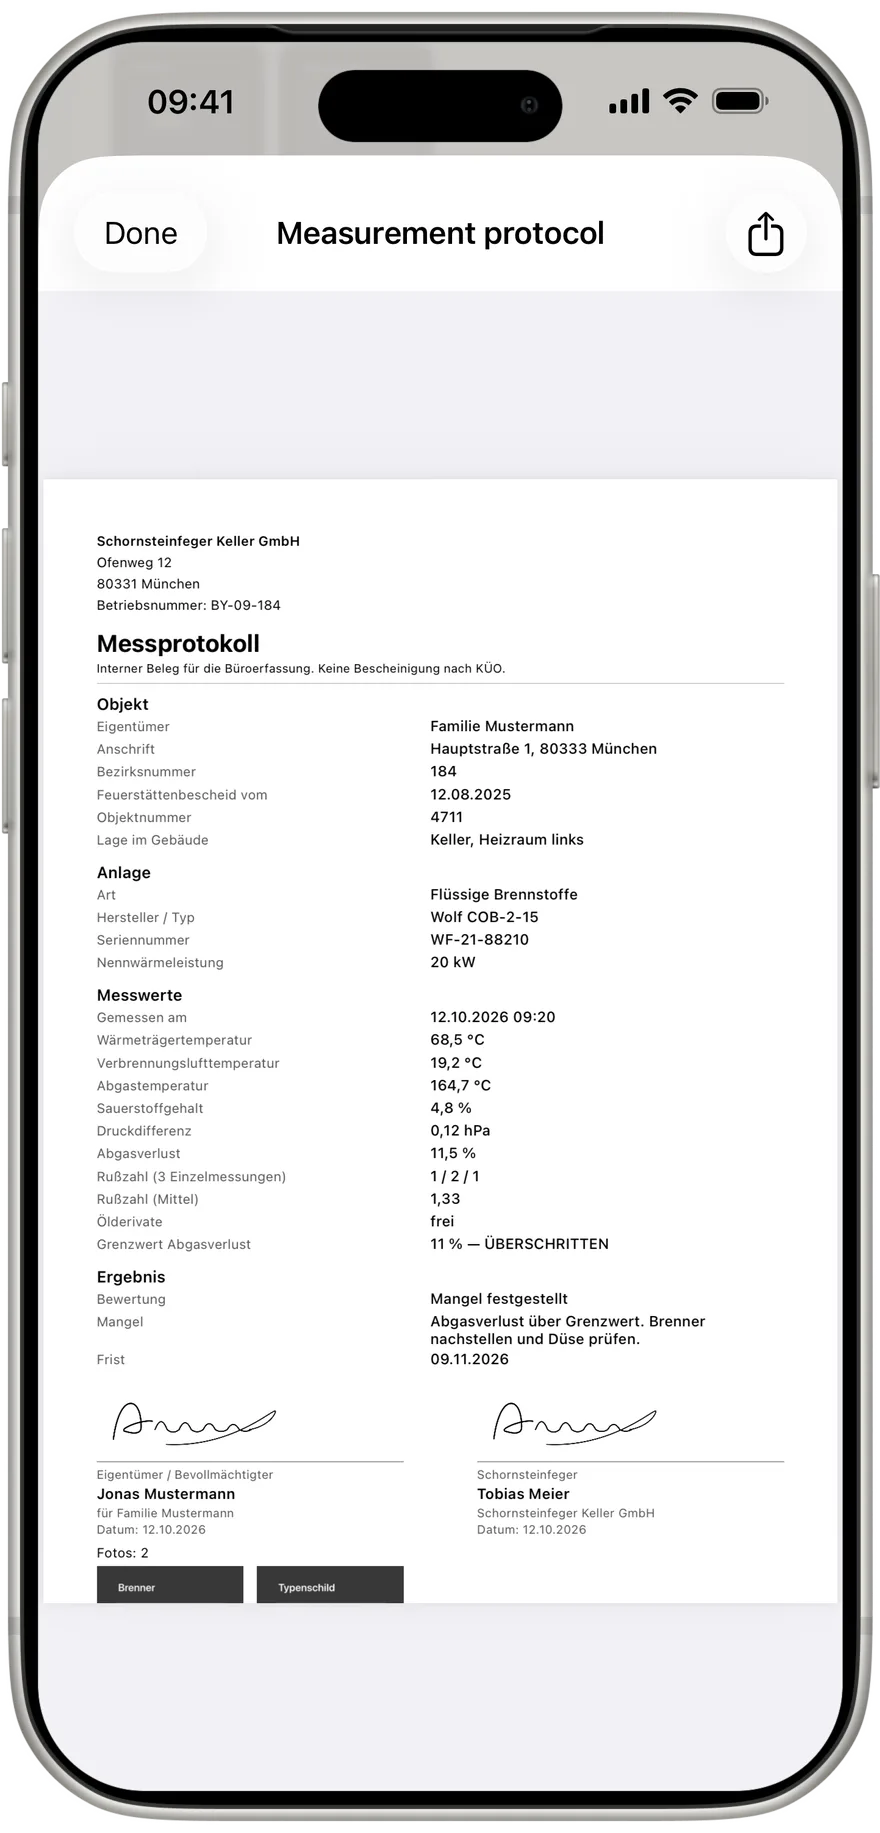
Once completed you see "Completed on" with date and time. "View the protocol" opens the measurement PDF, "Export" shares it by mail, messenger or to a folder. The PDF is made on the phone, with no signal. If the property has more appliances, "Measure next appliance" takes you straight to the next one.
At the end of the day, "Today" shows the "Day export" with every measurement completed today as one CSV file for the office. The day is done, with nothing left to type up in the evening.
A protocol before you are out of the cellar
PDF and CSV are made right on the phone with no signal. Free for one person, for iPhone and Android.
Do I need an account for the first measurement?
No. Kehrwerk starts without signing in. Everything you capture stays on your phone.
What happens with no signal in the cellar?
Nothing changes. Measurement, limit check, photos, signature and PDF all work fully offline.
Can I change a completed measurement?
Yes, with "Reopen measurement". The app records the change, and the protocol then shows "Last amended on" with the date.
What does Kehrwerk cost?
Nothing for one person, for good. A business only pays when it wants to connect several staff to the office.
Why does the app show no limit for my appliance?
Usually the rated heat output is missing. The measurement then says the limit cannot be checked without it. Add the kW under "Details" on the appliance.
Try Kehrwerk on your next reading.
The chimney sweep app for flue gas readings on site. Free forever for one person, no signup.